



✿ ⋆。˚ ♡ ˚。⋆ ✿
TINY JOY ARCHIVES · THE KITCHEN EDITION
♡ Kaylvang's Ever-Changing Cookbook ♡
& other little kitchen joys ♡
Dear little visitor,
Welcome to my tiny kitchen corner of the internet! I'm Kaylvang, and this is where I'm collecting recipes that make ordinary days feel a little softer: impossibly fluffy bread, homemade café drinks, berry syrups, lazy dinners, and experiments that occasionally get a little too ambitious.
You'll meet Lil Hammie, my beloved Hamilton Beach bread robot, Deb, my sourdough starter, and an honestly unreasonable amount of matcha. I'm a big believer in using what we already have, so not everything here requires a fancy ingredient or perfect technique. Sometimes dinner is chicken, frozen vegetables, and whatever sauce is in the cupboard. That's cooking, baby. ♡
This isn't a finished cookbook. It's a living little recipe journal I'll keep editing as I make new things, tweak old favourites, and collect more tiny kitchen victories. Feel free to borrow a recipe, make it yours, or just stay for the cozy vibes.
With love & a suspicious amount of butter,
— Kaylvang ♡

♡ Established: November 9, 2026 · Edition: 1.4, the recipe shelf update ♡
✎ Last updated: November 10, 2026 — more recipes will appear here as I make them.
♡ A small legend
♡ Keeper = a recipe I love and want to keep making.
☆ Trial = a little experiment I'm still playing with.
✎ My notes = little tweaks, favourites, and kitchen adventures.
Everything is measured in cups and spoons. My usual meals are vegetarian, fish, or chicken; I don't cook with red meat or pork. Oat milk is a regular guest. Dairy sometimes appears, even though my stomach likes to complain about it.
For Lil Hammie, I follow the machine's instructions; my usual loading order is wet ingredients, dry ingredients, then yeast last.
🎀 A little gift from my kitchen 🎀
Every recipe has its own printable 5 × 7-inch card—for your recipe binder, fridge, or someone you love. I made them in soft pink and sage green, with my favourite handwritten font. ♡
The recipes are all written out below, too! You never need to download anything just to cook with me.
✿ The Recipe Shelf ✿
A little map of everything waiting below. ♡
Lil Hammie's Bakery
- The Redemption Loaf — Japanese-Style Milk Bread
- Lazy Bread Machine Cinnamon Bread
- Cinnamon Swirl Bread — The Bread Surgery Loaf
- Honey Whole-Wheat Loaf — Our October Test
- Deb's Sourdough Discard Loaf
The Syrup Shelf
- Banana Bread Syrup
- Black Sesame Blizzard Creamer 2.0
- Blueberry Syrup
- Strawberry Syrup — Pourable & Thick
- Four-Berry Café Syrup
- Cherry Purée Syrup
The Little Café
- Iced Black Sesame Matcha
- Honey Milk Hojicha
- Raspberry Lemonade Matcha
- Peach Yogurt Drink
- Kaylvang's No Additional Sugar — Fresh Strawberry-Inspired Yogurt
- Strawberry Mochi Yogurt — One Serving
- Strawberry-Banana Yogost-Inspired Yogurt
Savoury Suppers
- Kaylvang's Japanese Curry
- Kaylvang's Simple Omurice
- Kaylvang's Tuna Onigiri
- Honey-Soy Fresh Salmon Bowls
- Pantry-Style Teriyaki Chicken Stir-Fry

🍞 Lil Hammie's Bakery
bread, milk-bread clouds, cinnamon and Deb ♡
The Redemption Loaf — Japanese-Style Milk Bread
♡ Keeper · Hamilton Beach · 1.5 lb · Basic/White · Light crust
The one that finally rose tall, came out soft and squishy, and restored our faith in the bread robot. Our chosen white bread, forever and ever. Amen.
Ingredients
- ¾ cup milk
- ¼ cup water
- 3 tbsp softened butter
- 3 cups bread flour
- ¼ cup sugar
- 2 tbsp milk powder (our usual amount from earlier bread notes)
- 1 tsp salt (our usual amount from earlier bread notes)
- 1 tbsp + 1½ tsp Fleischmann's Bread Booster
- 2 tsp Fleischmann's Quick Rise yeast
- Note: No egg listed in this version
Method
- Add milk, water, and softened butter to the bread pan.
- Add flour, sugar, milk powder, salt, and booster, keeping the yeast separate until last.
- Add yeast last. Choose Basic/White, 1.5 lb, Light.
- Look at the dough during its early knead: it should become a soft, cohesive ball. Only make tiny adjustments if necessary.
- Let the machine finish. Cool about 1 hour before slicing—if the bread goblin within permits it.
My note: The goal is a tall, fluffy bread cloud that pulls apart in soft ribbons—not brioche, not a brick. Let the dough knead until smooth and stretchy, then try to wait before slicing. 😂
🎀 ♡ Take this recipe home — view/save printable card ♡

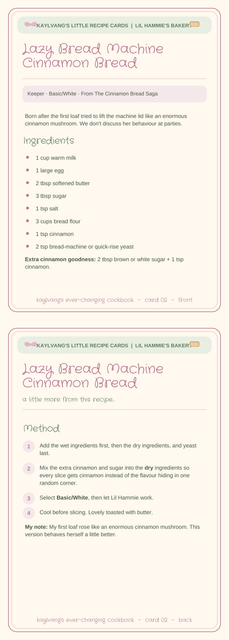
Lazy Bread Machine Cinnamon Bread
♡ Keeper · Basic/White · From The Cinnamon Bread Saga
Born after the first loaf tried to lift the machine lid like an enormous cinnamon mushroom. We don't discuss her behaviour at parties.
Ingredients
- 1 cup warm milk
- 1 large egg
- 2 tbsp softened butter
- 3 tbsp sugar
- 1 tsp salt
- 3 cups bread flour
- 1 tsp cinnamon
- 2 tsp Fleischmann's Quick Rise yeast
Extra cinnamon goodness: 2 tbsp brown or white sugar + 1 tsp cinnamon.
Method
- Add the wet ingredients first, then the dry ingredients, and yeast last.
- Mix the extra cinnamon and sugar into the dry ingredients so every slice gets cinnamon instead of the flavour hiding in one random corner.
- Select Basic/White, then let Lil Hammie work.
- Cool before slicing. Lovely toasted with butter.
My note: My first loaf rose like an enormous cinnamon mushroom. This version behaves herself a little better. ☺
🎀 ♡ Take this recipe home — view/save printable card ♡
Cinnamon Swirl Bread — The Bread Surgery Loaf
☆ Our original cinnamon swirl adventure · Basic/White · 2 lb · Light crust
The loaf that needed bread surgery. I rolled a real cinnamon-sugar swirl into the dough, and she rewarded me by trying to lift Lil Hammie's lid. Delicious, dramatic, and absolutely a kitchen memory worth keeping.
Dough
- 1 cup + 2 tbsp milk
- 1 egg
- 3 tbsp softened butter
- 3 tbsp sugar
- 1 tsp salt
- 3 cups white bread flour
- 1 tbsp Fleischmann's Bread Booster
- 2 tsp Fleischmann's Quick Rise yeast
Cinnamon swirl filling
- 2 tbsp softened butter
- ⅓ cup sugar
- 1½ tbsp cinnamon
The bread surgery method
- Add the dough ingredients to Lil Hammie in the usual order: wet ingredients, dry ingredients, and yeast last.
- Select Basic/White, 2 lb, Light crust. Ignore the mix-in beep and let all kneading finish (about 40–45 minutes, depending on the cycle).
- Pause the machine after kneading. Lift out the dough and remove the kneading paddle.
- Flatten the dough into a roughly 9 × 12-inch rectangle. Spread on the softened butter, then sprinkle evenly with the cinnamon and sugar.
- Roll the dough up snugly from a short end. Pinch the seam and ends shut.
- Return the roll to the bread pan seam-side down, without the paddle. Resume the machine's rise and bake cycle.
- Let the bread cool for 20–30 minutes before slicing.
My note: Our original loaf mushroomed over the pan and some slices barely had any cinnamon. The top was cooked, though, and smelled like cinnamon rolls! This is the original bread-surgery version, not the simpler cinnamon bread above. ☺
🎀 ♡ Take this recipe home — view/save printable card ♡

Honey Whole-Wheat Loaf — Our October Test
☆ Trial, baked October 27 · 1.5 lb · Whole Grain · Light crust
Ingredients
- 1 cup + 2 tbsp milk
- 3 tbsp butter
- 2 tbsp honey
- 3 cups whole-wheat bread flour
- 1¼ tsp salt
- 1¼ tsp Fleischmann's Quick Rise yeast
Method
- Add wet ingredients to the bread pan, then flour and salt, with yeast last.
- Select Whole Grain, 1.5 lb, Light crust.
- Check the dough during kneading; let the loaf cool before slicing.
Next time: For a softer, fluffier version, I want to try 2 cups whole-wheat flour + 1 cup bread flour, 1 cup + 3 tbsp milk, 3 tbsp honey, 3 tbsp butter, 1¼ tsp salt, and 1½ tsp yeast. That variation is still on my experiment list. ♡
🎀 ♡ Take this recipe home — view/save printable card ♡

Deb's Sourdough Discard Loaf
♡ Keeper · White · 1.5 lb · Medium crust · Lil Hammie, with an optional oven method
Deb finally gets her own recipe card! I make this one in Lil Hammie, but I've kept the oven directions too.
This recipe actually comes from my amazing Grandma. ♥
Ingredients
- ½ cup sourdough discard
- 1 cup + 2 tsp warm water
- 1 tbsp honey or 1 tbsp + 2 tsp sugar
- 3½ tbsp melted butter
- 4 cups flour
- 2¼ tsp instant yeast
- 2 tsp salt
Lil Hammie method
- Add the wet ingredients, then the flour and salt, with the yeast last.
- Select White, 1.5 lb, Medium crust.
- Check for a soft, cohesive dough during kneading; add a little flour or water only if needed.
- Let Lil Hammie finish, then cool the loaf before slicing.
Optional mixer-and-oven method
- Combine the ingredients in a mixer and mix/knead for 6–8 minutes.
- Let the dough rise for 45–60 minutes, or until doubled.
- Shape it into a loaf and place it in a greased bread pan.
- Cover lightly and let it rise again until risen.
- Bake at 350°F for 30–35 minutes.
- Butter the top before removing it from the pan, as the handwritten note recommends. Remove from pan and cool.
My note: Cups and spoons are handy, but this loaf started as a weighed recipe, so the flour and water amounts are approximate. Watch the dough while it kneads—Lil Hammie knows the drill. ♡
🎀 ♡ Take this recipe home — view/save printable card ♡

♡ end of this little chapter ♡

🍌 The Syrup Shelf
tiny jars, berries, bananas and black sesame ♡
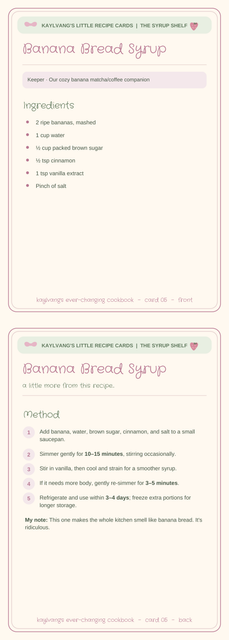
Banana Bread Syrup
♡ Keeper · Our cozy banana matcha/coffee companion
Ingredients
- 2 ripe bananas, mashed
- 1 cup water
- ½ cup packed brown sugar
- ½ tsp cinnamon
- 1 tsp vanilla extract
- Pinch of salt
Method
- Add banana, water, brown sugar, cinnamon, and salt to a small saucepan.
- Simmer gently for 10–15 minutes, stirring occasionally.
- Stir in vanilla, then cool and strain for a smoother syrup.
- If it needs more body, gently re-simmer for 3–5 minutes.
- Refrigerate and use within 3–4 days; freeze extra portions for longer storage.
My note: This one makes the whole kitchen smell like banana bread. It's ridiculous. 🍌
🎀 ♡ Take this recipe home — view/save printable card ♡
Black Sesame Blizzard Creamer 2.0
♡ Keeper · Tastes like a melted DQ Blizzard, in the best possible way.
Ingredients
- ¼ cup black sesame powder
- ⅓ cup brown sugar
- 2 tbsp water
- ½ cup + 2 tbsp whipping cream
- 1 tsp vanilla
- Pinch of salt
Method
- Warm the sugar and water gently until the sugar dissolves.
- Whisk in the black sesame powder and salt until smooth; remove from heat and cool.
- Whisk in cold cream and vanilla. Blend on low for about 15 seconds for an extra-silky finish.
- Chill for 2–3 hours to thicken; stir before serving.
- Refrigerate and use within 4-5 days.
My note: I love this recipe just the way it is. Honestly, melted DQ Blizzard goodness. 🤤
🎀 ♡ Take this recipe home — view/save printable card ♡

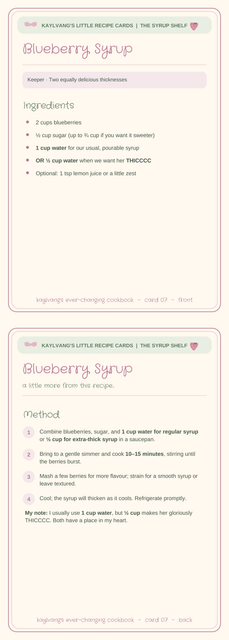
Blueberry Syrup
♡ Keeper · Two equally delicious thicknesses
Ingredients
- 2 cups blueberries
- ½ cup sugar (up to ¾ cup if you want it sweeter)
- 1 cup water for our usual, pourable syrup
- OR ½ cup water when we want her THICCCC
- Optional: 1 tsp lemon juice or a little zest
Method
- Combine blueberries, sugar, and 1 cup water for regular syrup or ½ cup for extra-thick syrup in a saucepan.
- Bring to a gentle simmer and cook 10–15 minutes, stirring until the berries burst.
- Mash a few berries for more flavour; strain for a smooth syrup or leave textured.
- Cool; the syrup will thicken as it cools. Refrigerate promptly.
My note: I usually use 1 cup water, but ½ cup makes her gloriously THICCCC. Both have a place in my heart. 🫐♥
🎀 ♡ Take this recipe home — view/save printable card ♡
Strawberry Syrup — Pourable & Thick
♡ Keeper · My favourite is the silky, pourable version!
My favourite pourable café syrup
- 2 cups strawberries
- ¾ cup sugar
- 1 cup water
Simmer 10–12 minutes until the berries soften. Blend smooth if desired, and strain for a silky syrup. Cool and refrigerate.
Optional thicker, fruit-forward version
- 1½–2 cups frozen strawberries
- ¼–⅓ cup sugar
- 1–2 tbsp water
- Optional: squeeze of lemon or ½ tsp vanilla
Simmer 10–15 minutes. Leave chunky, blend, or strain to the texture you want. Refrigerate for 5–7 days or freeze portions.
My note: I LOVE how the new syrup turned out and the way it pours. The 2-cup strawberry / 1-cup water version is my keeper. The thicker version is here for days when I want more fruit in every spoonful. 🍓
🎀 ♡ Take this recipe home — view/save printable card ♡

Four-Berry Café Syrup
♡ Keeper · A little four-berry café treat
Ingredients
- 2 cups frozen mixed berries (strawberry, raspberry, blueberry, blackberry)
- ½ cup sugar
- ½ cup water
- A little lemon juice or citric acid, to taste (optional)
Method
- Combine mixed berries, sugar, and water in a small saucepan.
- Simmer gently for 10–12 minutes, stirring until the berries soften.
- Blend if you want a smooth syrup, then stir in a little lemon or citric acid if desired.
- Strain for a silky café-style finish, or leave some berry texture. Cool and refrigerate promptly.
My note: Strawberries, raspberries, blueberries, and blackberries together are such a lovely combination. ♡
🎀 ♡ Take this recipe home — view/save printable card ♡

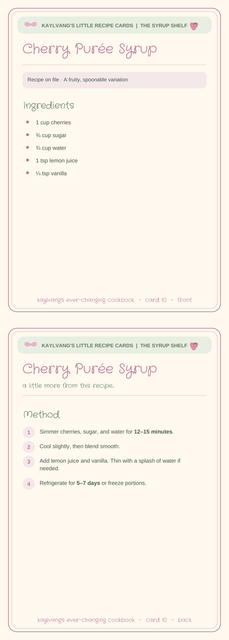
Cherry Purée Syrup
☆ Recipe on file · A fruity, spoonable variation
Ingredients
- 1 cup cherries
- ¾ cup sugar
- ¾ cup water
- 1 tsp lemon juice
- ¼ tsp vanilla
Method
- Simmer cherries, sugar, and water for 12–15 minutes.
- Cool slightly, then blend smooth.
- Add lemon juice and vanilla. Thin with a splash of water if needed.
- Refrigerate for 5–7 days or freeze portions.
🎀 ♡ Take this recipe home — view/save printable card ♡
♡ end of this little chapter ♡

🍵 The Little Café
matcha, hojicha and Yogost-inspired comforts ♡
Iced Black Sesame Matcha
♡ Favourite build · 1 serving
Ingredients
Sesame milk
- 1½ tsp black sesame powder
- 1 tbsp hot water
- 1–1½ tbsp sugar or maple syrup
- Pinch of salt
- ¼ tsp vanilla
- ½ cup oat milk
OPTIONAL: View Black Sesame Creamer in a large batch above. Use 2-3 tablespoons to taste.
Matcha layer
- 1-2 tsp matcha
- ¼ cup warm water (not boiling)
- Ice
Method
- Whisk sesame powder with hot water, sweetener, salt, and vanilla until smooth.
- Stir or froth with oat milk.
- Whisk matcha separately with warm water until smooth.
- Add ice to a glass, pour in sesame milk, then float matcha on top.
Optional cloud top: Froth 2 tbsp whipping cream, 1 tbsp oat milk, 1 tsp black sesame powder, 1–2 tsp sweetener, a pinch of salt, and a touch of vanilla; spoon over the drink.
🎀 ♡ Take this recipe home — view/save printable card ♡

Honey Milk Hojicha
♡ Keeper · 1 serving · Hot or iced
Ingredients
- 1 tsp hojicha powder
- About 1 tbsp honey
- 1 cup milk (whatever kind I'm in the mood for)
- 1–2 tbsp warm water, just enough to whisk the powder smooth
Basic method
- Whisk the hojicha powder smooth with a little water.
- Stir in the honey and combine with the milk.
- Hot: Warm the milk, stir in the honey and whisked hojicha, and serve cozy. Iced: Add ice to a glass of cold milk and honey, stirring the honey into the whisked hojicha first so it dissolves; pour together.
My note: The perfect little cozy drink whether I'm craving something warm or making an iced afternoon treat.
🎀 ♡ Take this recipe home — view/save printable card ♡

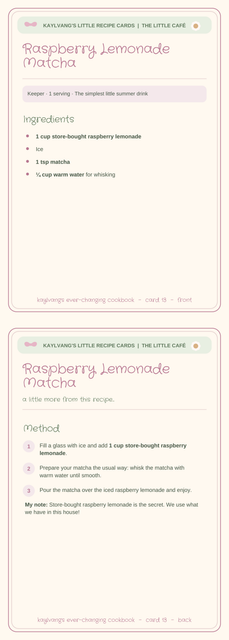
Raspberry Lemonade Matcha
♡ Keeper · 1 serving · The simplest little summer drink
Ingredients
- 1 cup store-bought raspberry lemonade
- Ice
- 1 tsp matcha
- ¼ cup warm water for whisking
Method
- Fill a glass with ice and add 1 cup store-bought raspberry lemonade.
- Prepare your matcha the usual way: whisk the matcha with warm water until smooth.
- Pour the matcha over the iced raspberry lemonade and enjoy.
My note: Store-bought raspberry lemonade is the secret. We use what we have in this house! ♡
🎀 ♡ Take this recipe home — view/save printable card ♡
Peach Yogurt Drink
☆ Yogost-inspired · Creamy peach goodness, with optional stovetop mochi
Ingredients
- 1 cup Greek yogurt
- ¾ cup drained canned peaches
- ¼ cup oat milk
- 1 tbsp cream
- 1–2 tbsp peach syrup (or juice from the canned peaches to taste)
- Optional: 2 tbsp extra diced peaches for texture
Method
- Blend yogurt, peaches, oat milk, cream, and syrup for 15–20 seconds until thick and creamy.
- Taste and adjust the sweetness. Fold in extra diced peaches if desired.
- Pour into a glass. Add little pieces of stovetop mochi if I'm feeling extra fancy.
Optional stovetop mochi
This is the same soft, stretchy mochi I like in my strawberry yogurt. The peach pairing is still one to try!
- ¼ cup glutinous rice flour
- ⅓ cup milk
- 1 tbsp sugar
- ⅛ tsp vanilla
Whisk in a saucepan over medium-low heat for 5–8 minutes, stirring until glossy, stretchy, and cooked through. Cool until safe to handle, snip into small pieces, and fold into the peach yogurt drink if desired.
My note: Peach Mochi is my favourite drink to order at Yogost. This is my little at-home peach adventure. 🍑
🎀 ♡ Take this recipe home — view/save printable card ♡

Kaylvang's No Additional Sugar — Fresh Strawberry-Inspired Yogurt
♡ Keeper · Yogost-inspired, naturally sweet from strawberries
Ingredients
- 1 cup plain unsweetened Greek yogurt
- 1 cup strawberries (fresh or thawed frozen)
- ¼ cup regular milk
- 1 tbsp unsweetened heavy cream
- No added sugar, syrup, or ice
Method
- If using frozen strawberries, let them thaw a little first.
- Set aside 2 tbsp strawberries and mash them gently for little bits of fruit in the drink.
- Blend the remaining strawberries with the Greek yogurt, milk, and cream for 15–20 seconds, until thick and creamy.
- Spoon the mashed strawberries into the glass, pour the yogurt mixture over, and stir gently.
- If it needs to be colder, chill for 10–15 minutes rather than adding ice. If too tart, blend with a few extra strawberries instead of adding sugar.
🎀 ♡ Take this recipe home — view/save printable card ♡

Strawberry Mochi Yogurt — One Serving
♡ Yogost-inspired · Stovetop mochi is completely optional—no microwave needed
Yogurt base
- ½ cup plain Greek yogurt
- ⅓ cup milk
- 2 tbsp heavy cream
- ¾ cup strawberries
- 1–2 tbsp strawberry syrup or honey
- ¼ tsp vanilla extract
- Optional: ice
Optional soft, stretchy stovetop mochi
- ¼ cup glutinous rice flour
- ⅓ cup milk
- 1 tbsp sugar
- ⅛ tsp vanilla extract
Method
- Drink: Blend yogurt, milk, cream, strawberries, sweetener, vanilla, and optional ice until smooth.
- Pour into a glass and enjoy as-is, or make the mochi for a chewy treat.
- Optional mochi: Whisk the glutinous rice flour, milk, sugar, and vanilla in a small saucepan until smooth.
- Cook over medium-low heat for 5–8 minutes, stirring constantly, until glossy, stretchy, and slightly translucent, with no raw flour remaining.
- Let cool until safe to handle, then snip into tiny soft pieces and stir into the yogurt drink.
My note: I like my mochi soft and stretchy, almost like silly putty or mozzarella. That's the dream texture. 😂
🎀 ♡ Take this recipe home — view/save printable card ♡

Strawberry-Banana Yogost-Inspired Yogurt
♡ New recipe · 1 serving · Strawberry, banana, honey, and optional mochi
Ingredients
- ½ banana
- ½ cup strawberries
- ½ cup vanilla Greek yogurt
- 2 tbsp heavy cream
- 1–2 tbsp honey
- ¼ tsp vanilla extract
- A little ice
- Optional: pieces of soft stovetop mochi (see the strawberry recipe above)
Method
- Add the banana, strawberries, vanilla Greek yogurt, cream, honey, vanilla, and a little ice to the blender.
- Blend until creamy and smooth.
- Taste and adjust the honey if needed. Pour into a glass.
- Add a few pieces of optional stovetop mochi if I want a stretchy little treat. ♡
🎀 ♡ Take this recipe home — view/save printable card ♡

♡ end of this little chapter ♡

🍛 Savoury Suppers
rice bowls, curry and use-what-we-have dinners ♡
Kaylvang's Japanese Curry
♡ Regular homemade meal · S&B Golden Curry; half-box batch
Ingredients
- ½ box S&B Golden Curry roux blocks
- Onion
- Carrots
- Potatoes
- Chicken OR Yves vegetarian Ground Round (or a comparable plant-based ground if unavailable)
- Water according to the half-box directions on your package
- Rice, for serving
Practical method
- Chop the onion, carrots, and potatoes. Prepare either chicken or the plant-based ground.
- Cook the protein as appropriate, then simmer the vegetables with water until tender.
- Add half a box of Golden Curry roux and stir until dissolved and the curry thickens, following the package's directions for water and cooking time.
- Serve over rice.
My note: I use half a box of Golden Curry and whatever amount of vegetables looks right. The original Yves Ground Round is harder to find these days, but a similar plant-based ground works too.
🎀 ♡ Take this recipe home — view/save printable card ♡

Kaylvang's Simple Omurice
♡ Regular homemade meal · The little rice-and-egg comfort plate
Ingredients
- 1 cup uncooked rice
- 1 cup water for the rice
- 2 eggs for the omelette
- Some chopped green onion
- Soy sauce, for drizzling
- Crunchy chili oil, optional topping (I sometimes add it!)
Method
- Cook 1 cup uncooked rice with 1 cup water in Zoji.
- Make an omelette (omu) with eggs and green onion.
- Put the omelette on top of the rice.
- Finish with a drizzle of soy sauce. Sometimes add a little crunchy chili oil on top.
My note: No fancy fried rice here. Just cozy rice, an omelette on top, green onions, and a little soy sauce. Crunchy chili oil is a very good idea too. ♡
🎀 ♡ Take this recipe home — view/save printable card ♡

Kaylvang's Tuna Onigiri
♡ Keeper · My beloved Zoji + the little triangle mould
Ingredients
- 1 cup sushi rice (uncooked)
- 1 cup water
- 1 can tuna
- Salt and pepper, to season the tuna
- Seaweed/nori, optional for wrapping
Method
- Cook 1 cup sushi rice with 1 cup water in our beloved Zoji.
- Season 1 can tuna with salt and pepper.
- Place a small bottom layer of cooked rice in each triangle mould—roughly less than half full, leaving space for the tuna.
- Drop about 1½–2 tbsp tuna into the middle of each triangle as a generous little mound or circle.
- Top with more cooked rice to enclose the tuna, then press the mould together firmly to shape the onigiri.
- Remove from the mould. Wrap in seaweed if you feel like it; it's optional.
My note: I don't measure the rice layers; I just leave enough room for a generous little mound of tuna in the middle. 🍙
🎀 ♡ Take this recipe home — view/save printable card ♡

Honey-Soy Fresh Salmon Bowls
☆ New house version to try · Fresh salmon, Zoji rice, bright crunchy toppings · 2 bowls
I love salmon bowls! This honey-soy version is next on my list to try.
Ingredients
Salmon and glaze
- 2 fresh salmon fillets
- 2 tbsp soy sauce
- 1 tbsp honey
- 1 tsp rice vinegar
- 1 tsp sesame oil
- 1 small garlic clove, finely minced
Rice and toppings
- 1 cup uncooked sushi rice
- 1 cup water (our usual Zoji rice ratio)
- ½ cucumber, sliced
- 1 carrot, shredded or cut into thin strips
- 2 green onions, sliced
- Optional: 1 avocado, nori strips, sesame seeds, a little crunchy chili oil
Method
- Cook 1 cup rice with 1 cup water in Zoji.
- Heat the oven to 400°F (200°C). Mix the soy sauce, honey, rice vinegar, sesame oil, and garlic. Reserve half in a clean bowl for the finished bowls before any glaze touches raw fish.
- Place salmon on a parchment-lined baking tray and brush with the glaze intended for cooking.
- Roast for roughly 12–18 minutes, depending on fillet thickness. Check with a thermometer; Health Canada recommends 70°C (158°F) internally for fish. Time alone is not a doneness test.
- Divide the rice between two bowls. Add cucumber, carrot, and green onion; place the cooked salmon on top.
- Drizzle with the separately reserved clean glaze. Finish with any optional toppings.
My note: I usually follow whatever salmon-bowl recipe sounds good that day. This is a little honey-soy house version I want to try next. 🐟
Food-safety reference: Health Canada — Safe internal cooking temperatures.
🎀 ♡ Take this recipe home — view/save printable card ♡

Pantry-Style Teriyaki Chicken Stir-Fry
♡ Regular household meal — flexible by design · Our kitchen motto: “We use what we have in this house.”
What I actually use
- Chicken
- Frozen Asian vegetable mix
- Bottled teriyaki sauce, whichever brand the local grocery store or Asian market has
Optional: starting amounts (not fixed household measurements)
- 1–2 chicken breasts, sliced
- 2–3 cups frozen Asian vegetable mix
- About ¼–½ cup bottled teriyaki sauce, adding to taste
- 1 tsp neutral oil if the pan needs it
- Rice or noodles for serving, if desired
Easy method
- Heat a large skillet or wok with a little oil. Cook the chicken until done, turning so the pieces brown evenly. Health Canada's safe internal temperature for chicken pieces is 74°C (165°F).
- Add the frozen Asian vegetable mix and cook until hot and tender-crisp.
- Pour in bottled teriyaki sauce to taste. Toss and cook briefly until everything is coated and warmed through.
- Serve as-is or over whatever rice or noodles are available.
My note: Chicken, frozen Asian veggies, and whatever bottled teriyaki sauce the grocery store has. We use what we have in this house! ♡
Food-safety reference: Health Canada — Safe internal cooking temperatures.
🎀 ♡ Take this recipe home — view/save printable card ♡

♡ end of this little chapter ♡

✎ My Little Kitchen Journal
This is my growing cookbook. Some recipes are old favourites, some are new experiments, and the best ones always seem to involve bread, strawberries, or matcha. ♡
♡ Things I'm playing with next:
- Adding the optional mochi to my peach yogurt drink.
- A softer honey whole-wheat loaf.
- More little Yogost-inspired drinks, obviously. 🍓
I'll keep adding the little kitchen adventures as they happen. This page gets to grow with me. ♡

♡ A little note from Kaylvang ♡
This cookbook is never really finished. Some recipes will change, some might disappear, and new favourites will find their way here. It's just a little archive of things that make my kitchen feel like home. Thanks for stopping by and if you try anything, please tell me! ♡
May our loaves rise politely, our mochi stretch magnificently, and our matcha taste like a tiny expensive café we somehow own.
♡ thanks for visiting my little kitchen ♡
Keep your apron on — this page is still growing. ✿
Comments
Displaying 0 of 0 comments ( View all | Add Comment )